
Receipt photo to Google Sheets with vision AI
Send a photo of a receipt: Gemini vision AI reads merchant, date, amounts and lines, validates them and logs them as an expense in your sheet.
Everything is created inactive in a new folder of your account. Nothing runs until you activate it, and you can undo it for 24 hours.
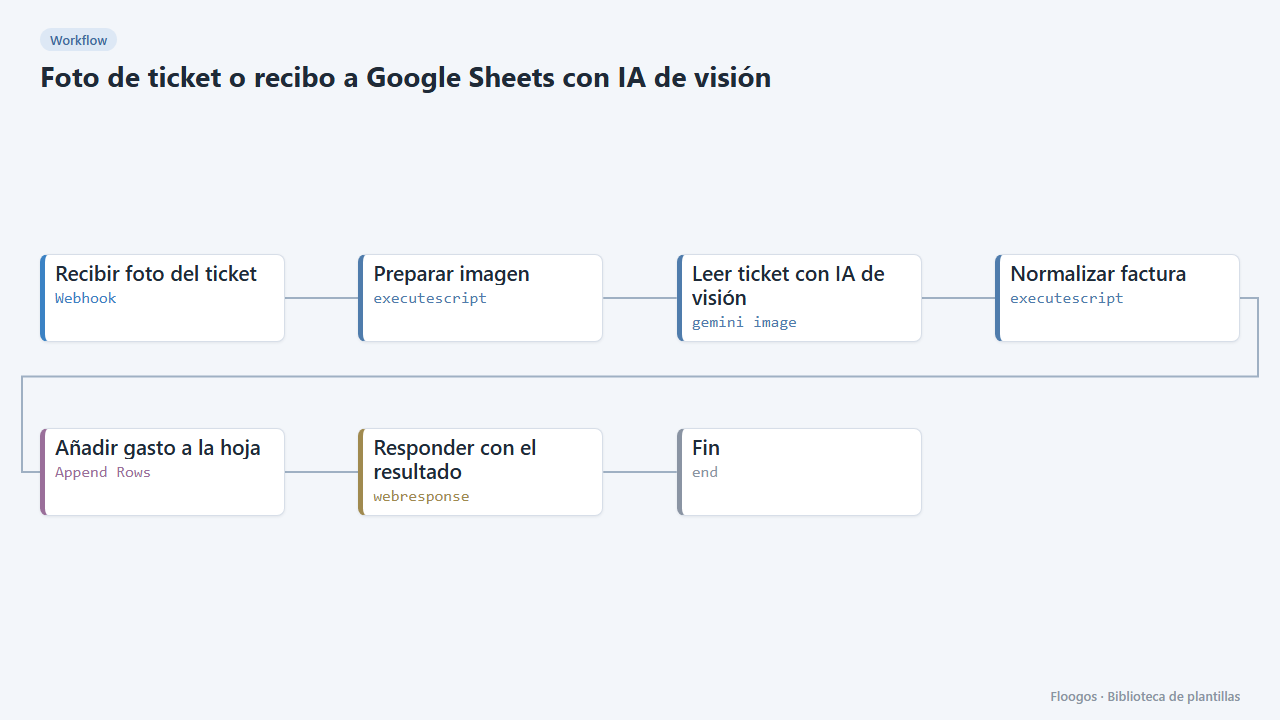
What it does
Great for travel or team expenses. An app, a form or a bot sends the photo (as base64) to a webhook; Gemini reads it directly (no separate OCR) and returns JSON with merchant, tax ID, number, date, net, VAT, total and lines. Normalizar factura turns amounts into numbers, sets the date to ISO format, reconciles net + VAT with the total and flags REVISAR if something does not add up. Finally a row is appended to Google Sheets.
What you need: a Google Gemini API key, a connected Google account and a sheet with the header Fecha, Nº factura, Proveedor, NIF, Base, % IVA, IVA, Total, Moneda, Estado, Observaciones.
Limitations: the Gemini node sends the image as JPEG (convert PNGs first if it fails) and quality depends on the photo: with poor light or blurry text the confidence drops and the expense is left as REVISAR. A simplified receipt with no tax ID or VAT breakdown is normal, so only date and total are required.
How to set it up
- 1
Connect the gemini credential
This template uses gemini in: Leer ticket con IA de visión. Create or pick the credential and assign it in those nodes.
- 2
Connect the google credential
This template uses google in: Añadir gasto a la hoja. Create or pick the credential and assign it in those nodes.
- 3
Copy the webhook URL (Recibir foto del ticket)
A new URL is generated on install. Paste it into the external system that must call this workflow.
- 4
Connect Gemini and the sheet
Connect Gemini in Leer ticket con IA de visión and choose the sheet and tab in Añadir gasto a la hoja.
- 5
Send a photo
Send a
POSTto the webhook URL with{"image_base64":"<base64 photo>"}(thedata:image/jpeg;base64,prefix is accepted). Maximum body size: 20 MB. - 6
Resulting JSON format
Before writing to the sheet, the Normalizar factura node generates a JSON like this:
{"proveedor":"Suministros Norte S.L.","nif":"B12345678","numero_factura":"F-2026-0412","fecha":"2026-09-30","moneda":"EUR","base_imponible":200,"iva_porcentaje":21,"iva_importe":42,"total":242,"lineas":[{"descripcion":"Papel A4 (caja)","cantidad":4,"precio_unitario":50,"importe":200}],"estado":"OK"}. You can reuse it to also send it to an ERP or a Data Store. - 7
Activate the workflow
Workflows are installed inactive. Once everything is set, activate it.
Related templates
Other templates that use similar nodes or integrations.
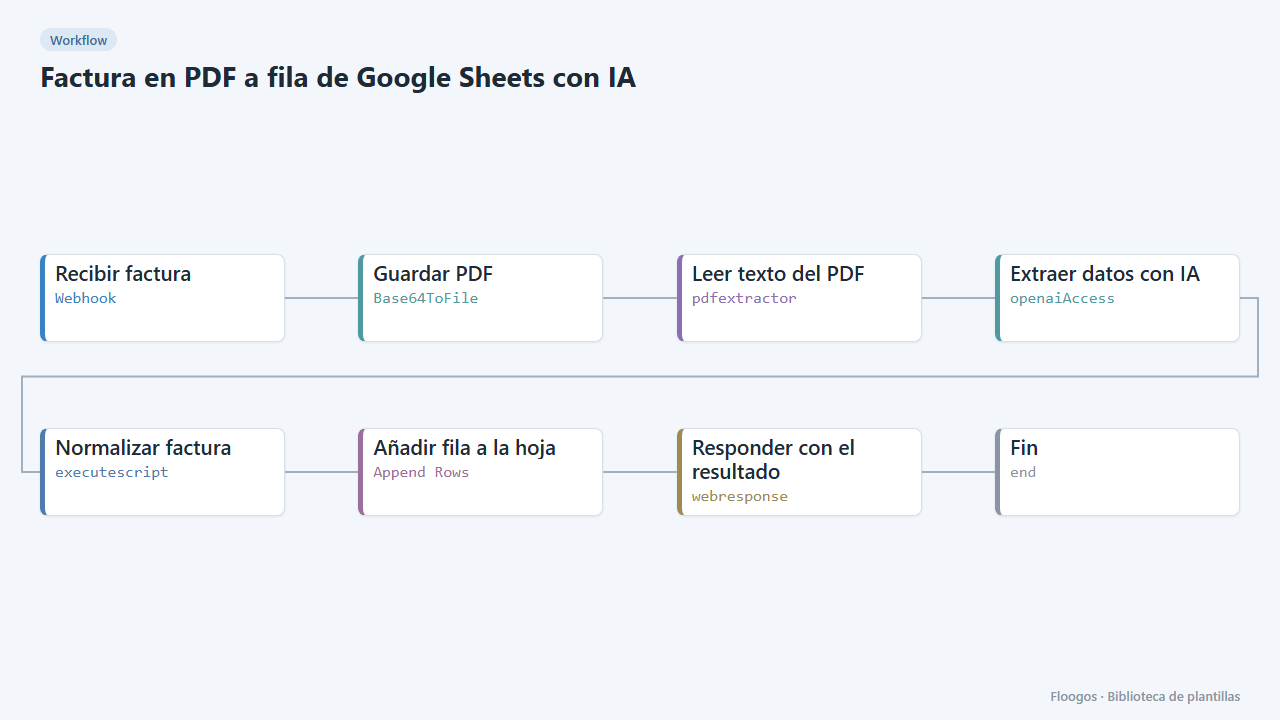
PDF invoice to a Google Sheets row with AI
Receive a PDF invoice, AI extracts supplier, tax ID, number, date, net, VAT, total and lines, validates the amounts and adds a row to your sheet.
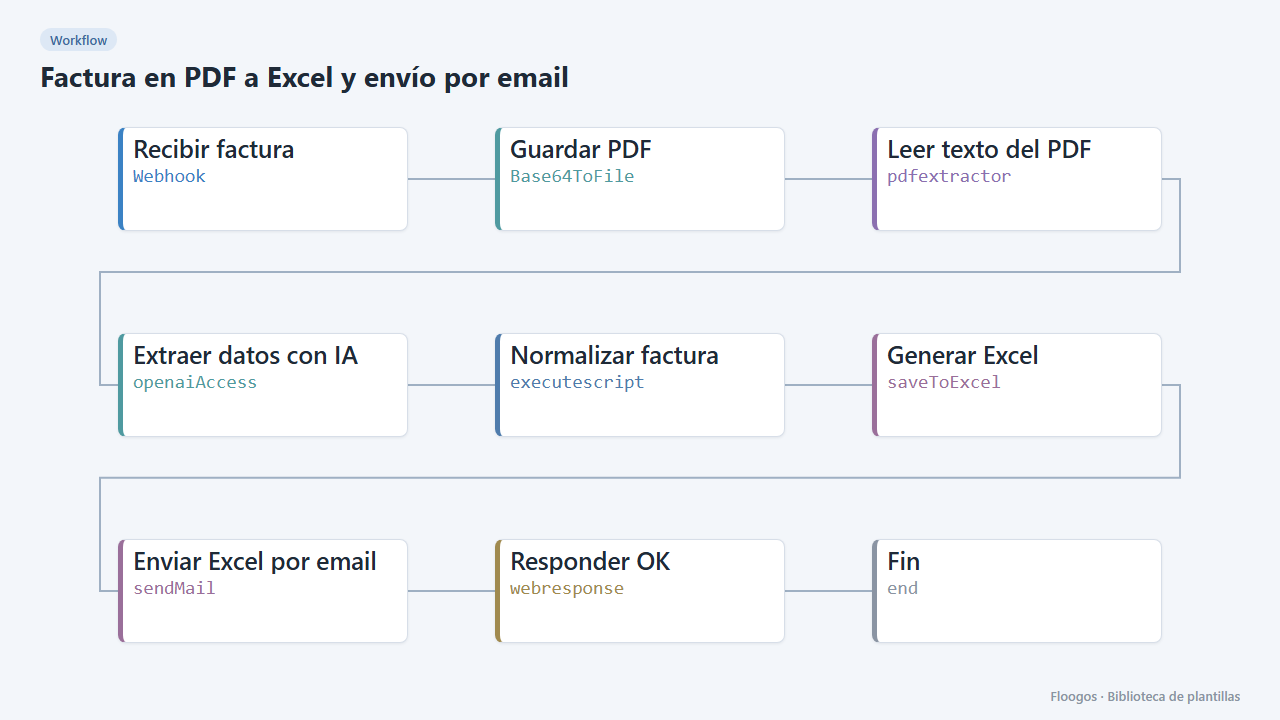
PDF invoice to Excel, sent by email
Turn each PDF invoice into an Excel file with its lines, net, VAT and total, and email the download link to accounting.
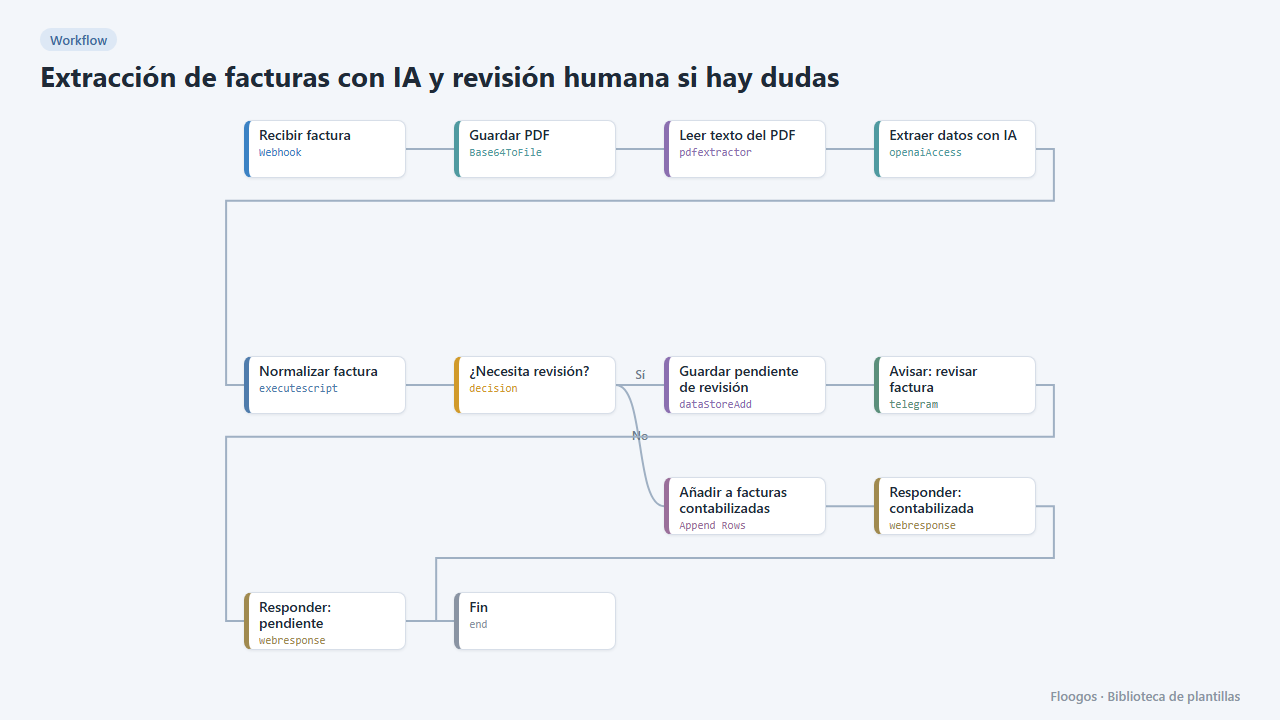
AI invoice extraction with human review when in doubt
AI extracts the invoice data; reliable ones go straight to the sheet, and if confidence is low or fields are missing they are set aside and you get a Telegram alert to review them.
Try it in under 5 minutes
Create the template in your account, connect your credentials and activate it when you are ready.
Use this template