
Appointment booking with manual approval and dashboard (Google Calendar)
The customer requests an appointment, the slot is held as tentative in your Google Calendar and you approve or reject it from a dashboard in one click; the customer gets the outcome by email.
Everything is created inactive in a new folder of your account. Nothing runs until you activate it, and you can undo it for 24 hours.
What it does
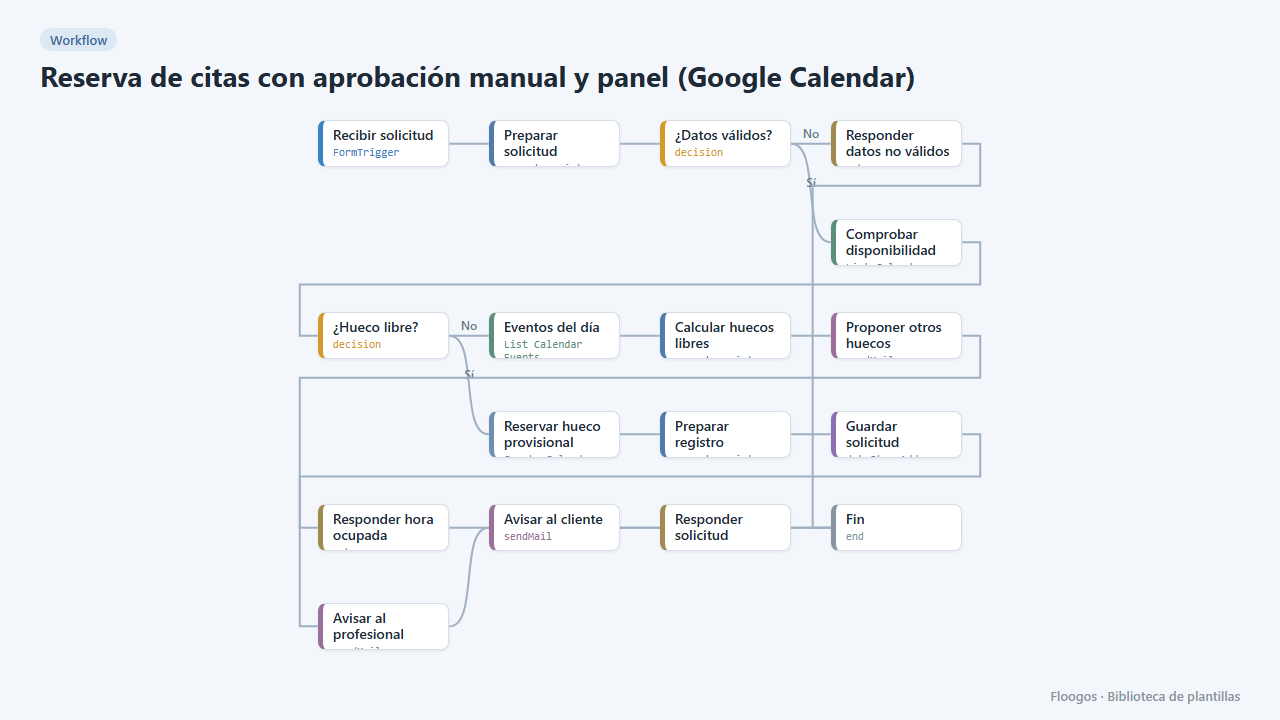
For businesses that want to decide who gets into their agenda (consultations, advisory, tailor-made services). The customer fills in the request form; the workflow checks your Google Calendar, creates a tentative [Pendiente] Cita: … event that holds the slot, stores the request as pendiente in the citas group, alerts the professional and tells the customer the request was received. If the time is taken, it suggests the free slots of that day.
In the Citas dashboard you see every booking with its status; clicking a pending request opens the decision form: if you approve, the event becomes Cita: … (confirmed) and the customer receives the confirmation email; if you reject, the tentative event is deleted and the customer gets a notice with your comment.
What is included: 2 forms, 2 workflows, 1 dashboard and the citas data group. Approved appointments work with the reminders and cancel/reschedule templates.
What you need: Google Calendar and SMTP connected.
Limitations: the customer is not added as a guest of the event (they only get emails); there is no visual picker of free slots; the decision form requires being logged in.
How to set it up
- 1
Connect the google credential
This template uses google in: Comprobar disponibilidad, Eventos del día, Reservar hueco provisional, Confirmar evento, Borrar evento provisional. Create or pick the credential and assign it in those nodes.
- 2
Connect the smtp credential
This template uses smtp in: Proponer otros huecos, Avisar al profesional, Avisar al cliente, Confirmar al cliente, Avisar del rechazo. Create or pick the credential and assign it in those nodes.
- 3
Copy the webhook URL (Recibir solicitud)
A new URL is generated on install. Paste it into the external system that must call this workflow.
- 4
Copy the webhook URL (Recibir decisión)
A new URL is generated on install. Paste it into the external system that must call this workflow.
- 5
Publish and test the form "Solicitud de cita"
Open it, publish it and submit a test entry to check the workflow starts.
- 6
Publish and test the form "Decisión sobre cita"
Open it, publish it and submit a test entry to check the workflow starts.
- 7
Open the dashboard "Citas"
Check that the test data shows up.
- 8
Set your schedule
In the Preparar solicitud node edit the "AJUSTA AQUÍ TU HORARIO" block (time zone, length, hours, weekdays, notice, place and business name). The form Hora options must match
HORAS. - 9
Connect Google Calendar and email
Connect Google in Comprobar disponibilidad, Eventos del día, Reservar hueco provisional, Confirmar evento and Borrar evento provisional (use the same calendar in all of them), and your SMTP in all the email nodes. Replace
profesional@tuempresa.comwith your email in Avisar al profesional. - 10
Test the full flow
Submit a request from the Solicitud de cita form:
[Pendiente] Cita: …should appear in your calendar. Open the Citas dashboard, click the pending row and approve (the event becomes confirmed) or reject (the event disappears). - 11
Activate the workflow
Workflows are installed inactive. Once everything is set, activate it.
Related templates
Other templates that use similar nodes or integrations.
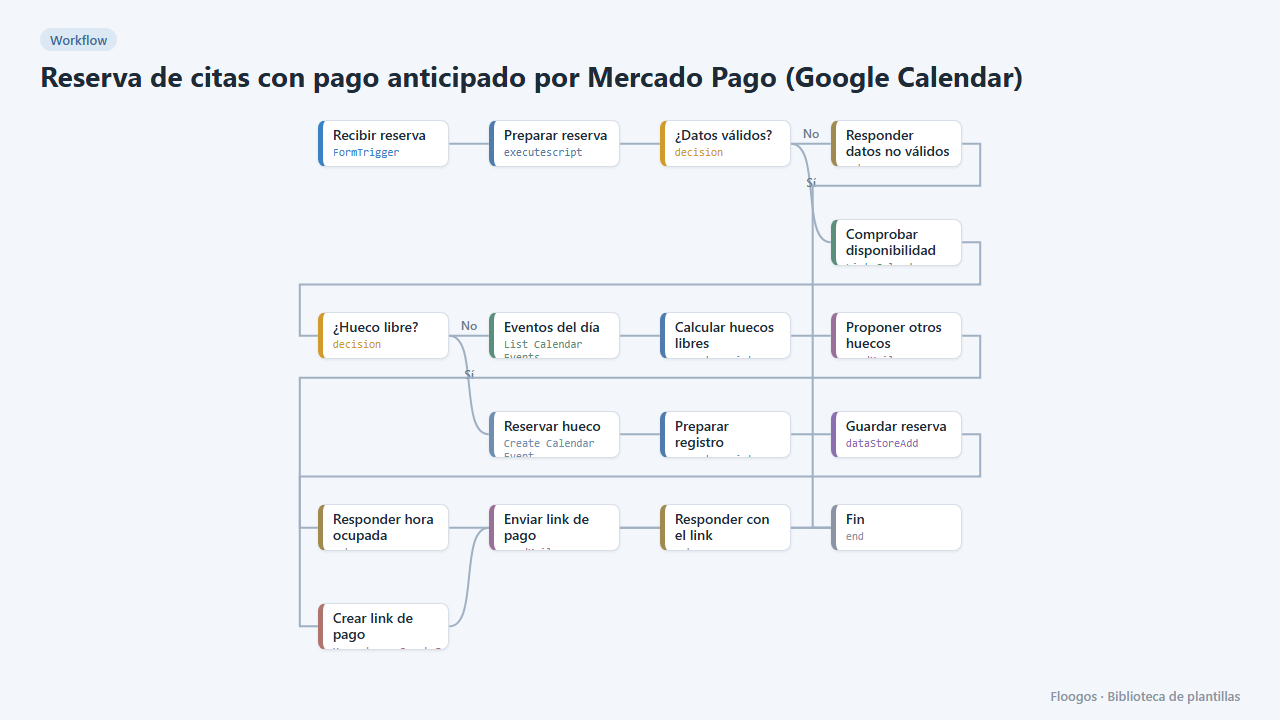
Appointment booking with upfront Mercado Pago payment (Google Calendar)
The customer books, gets a Mercado Pago payment link and the appointment is only confirmed in your Google Calendar once the payment is approved; if they do not pay, the slot is released automatically.
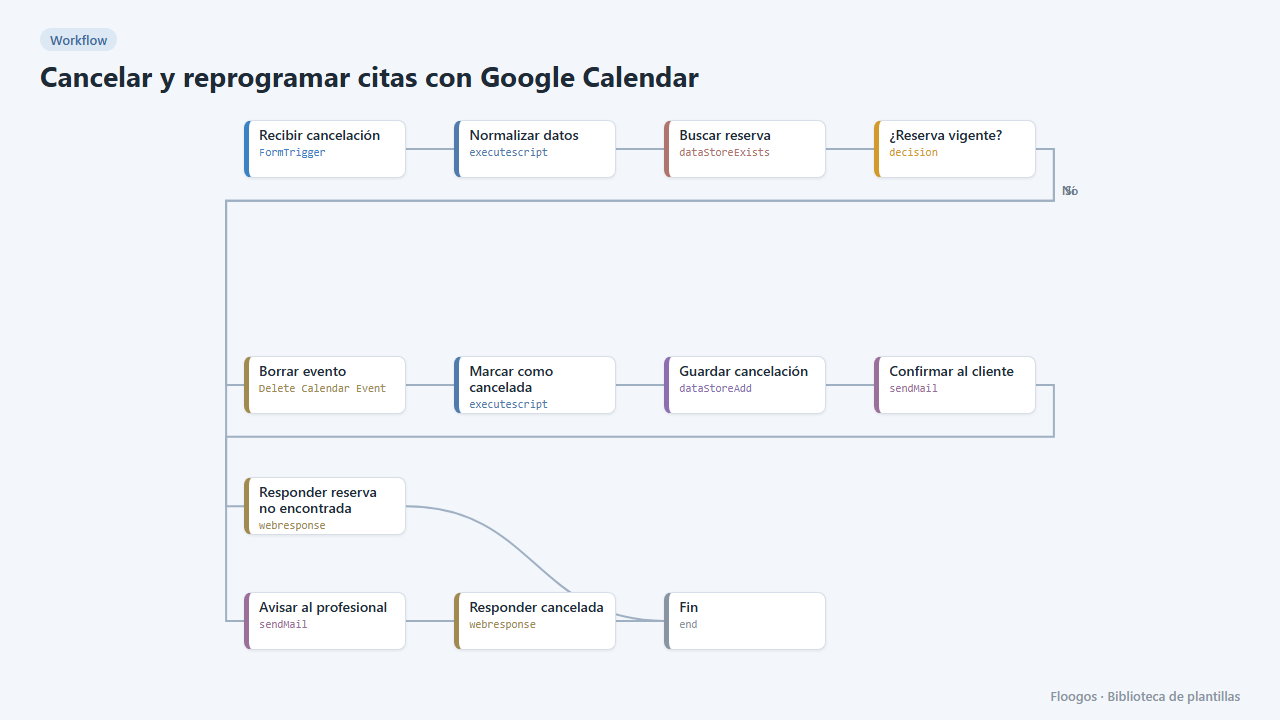
Cancel and reschedule appointments with Google Calendar
Two public forms for your customers to cancel or change their appointment with their booking code: the Google Calendar event is deleted or moved and everyone gets notified.
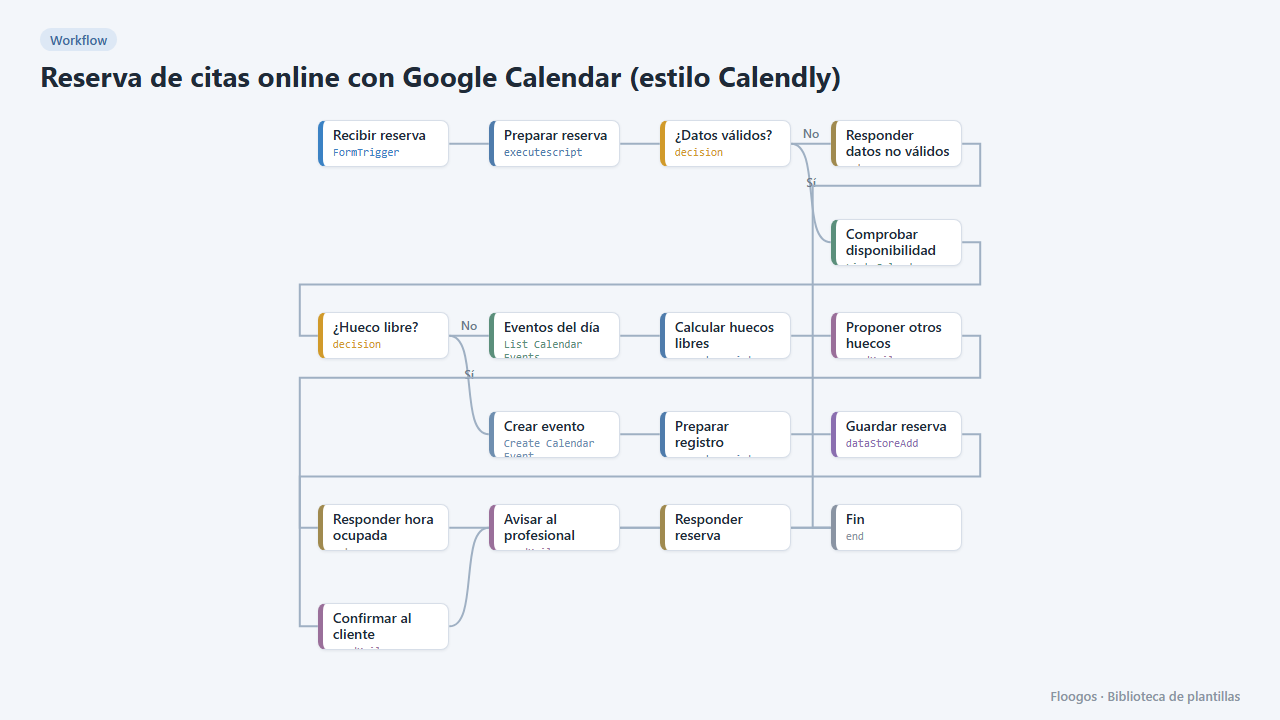
Online appointment booking with Google Calendar (Calendly-style)
A public form for your customers to book an appointment: it checks your Google Calendar, creates the event, confirms by email and, if the slot is taken, suggests the free slots of that day.
Try it in under 5 minutes
Create the template in your account, connect your credentials and activate it when you are ready.
Use this template