
Appointment booking with upfront Mercado Pago payment (Google Calendar)
The customer books, gets a Mercado Pago payment link and the appointment is only confirmed in your Google Calendar once the payment is approved; if they do not pay, the slot is released automatically.
Everything is created inactive in a new folder of your account. Nothing runs until you activate it, and you can undo it for 24 hours.
What it does
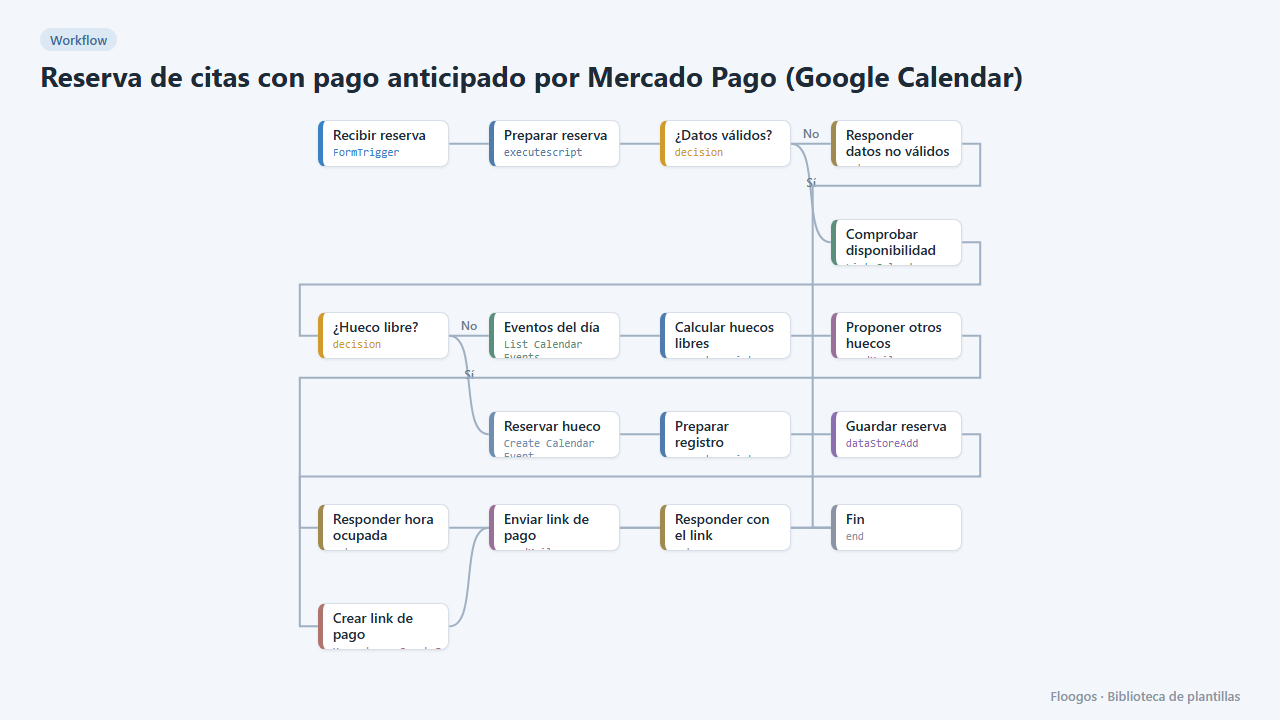
For those who charge upfront for appointments or consultations. The customer fills in the booking form; the workflow checks your Google Calendar, holds the slot with a [Pago pendiente] Cita: … event, creates a Mercado Pago payment link and shows it on screen and by email.
When Mercado Pago reports the payment as approved, the second workflow turns the event into Cita: … (confirmed), marks the booking as confirmada in the citas group and sends the confirmation to the customer and an alert to the professional. A third workflow, every 15 minutes, releases slots whose payment did not arrive within 30 minutes.
What is included: 1 form, 3 workflows and the citas data group (compatible with the reminders and cancel/reschedule templates).
What you need: Google Calendar, SMTP and a Mercado Pago account (Access Token) connected. The amount and currency are set in the Crear link de pago node.
Limitations: a fixed amount is charged per appointment; cancelling a paid appointment does not refund automatically (do it from Mercado Pago or with the refund template); Mercado Pago only supports its local currencies (ARS, BRL, MXN, CLP, COP, PEN, UYU); there is no visual picker of free slots.
How to set it up
- 1
Connect the google credential
This template uses google in: Comprobar disponibilidad, Eventos del día, Reservar hueco, Confirmar evento, Liberar hueco. Create or pick the credential and assign it in those nodes.
- 2
Connect the smtp credential
This template uses smtp in: Proponer otros huecos, Enviar link de pago, Confirmar al cliente, Avisar al profesional. Create or pick the credential and assign it in those nodes.
- 3
Connect the mercadopago credential
This template uses mercadopago in: Crear link de pago, Consultar pago. Create or pick the credential and assign it in those nodes.
- 4
Copy the webhook URL (Recibir reserva)
A new URL is generated on install. Paste it into the external system that must call this workflow.
- 5
Copy the webhook URL (Recibir notificación de pago)
A new URL is generated on install. Paste it into the external system that must call this workflow.
- 6
Publish and test the form "Reserva de cita con pago"
Open it, publish it and submit a test entry to check the workflow starts.
- 7
Open the dashboard "Citas"
Check that the test data shows up.
- 8
Set schedule and price
In Preparar reserva edit the "AJUSTA AQUÍ TU HORARIO" block. In Crear link de pago change
unit_price(price per appointment) and the currency. To change how long a slot is held, editRETENCION_MINin Buscar reservas caducadas. - 9
Connect Google, Mercado Pago and email
Connect Google Calendar (same calendar) in the calendar nodes of the 3 workflows, Mercado Pago in Crear link de pago and Consultar pago, and your SMTP in the email nodes. Replace
profesional@tuempresa.comin Avisar al profesional. - 10
Point Mercado Pago to the webhook
Copy the Webhook URL of the Confirmar pago de cita workflow and paste it as
notification_urlin Crear link de pago (or set it in your Mercado Pago dashboard, Webhooks section, "Payments" event). Without this step paid bookings are not confirmed automatically. - 11
Test with a test payment
Use Mercado Pago test credentials, book from the form, pay with a test card and check that the event goes from
[Pago pendiente]toCita:and the email arrives. Also activate the Liberar reservas sin pagar workflow (the cron is off after installing). - 12
Activate the workflow
Workflows are installed inactive. Once everything is set, activate it.
Related templates
Other templates that use similar nodes or integrations.
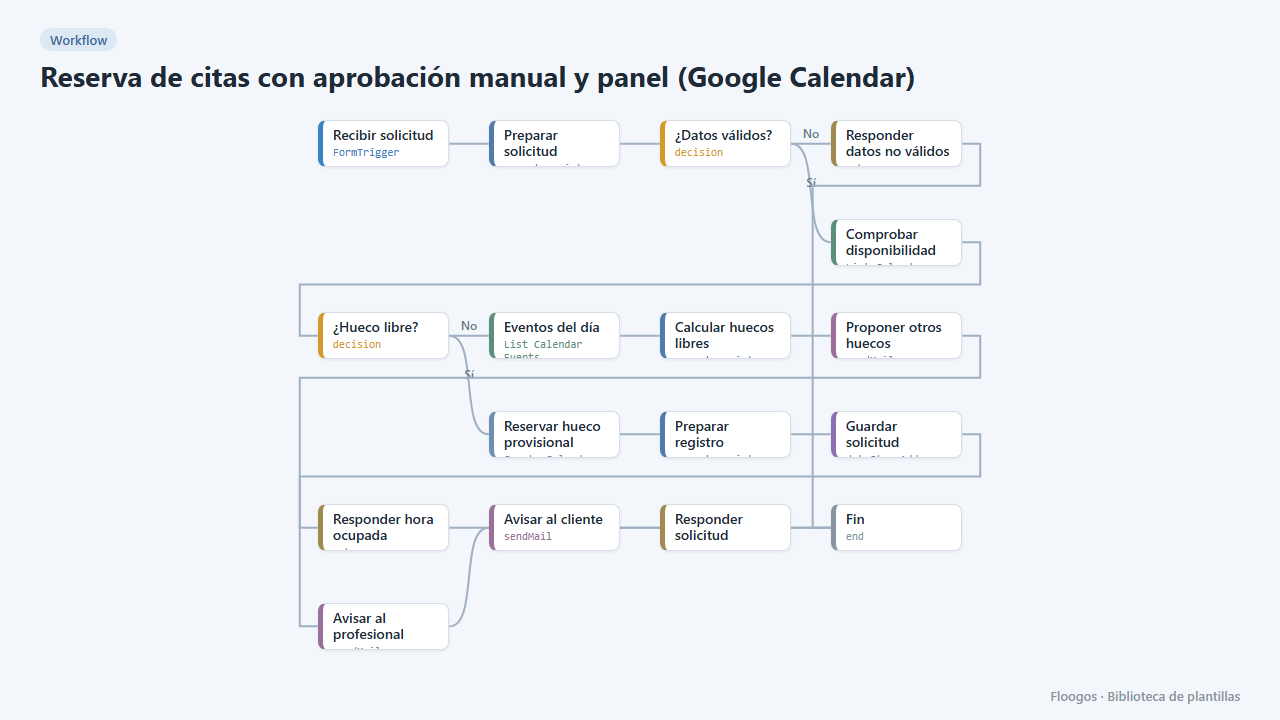
Appointment booking with manual approval and dashboard (Google Calendar)
The customer requests an appointment, the slot is held as tentative in your Google Calendar and you approve or reject it from a dashboard in one click; the customer gets the outcome by email.
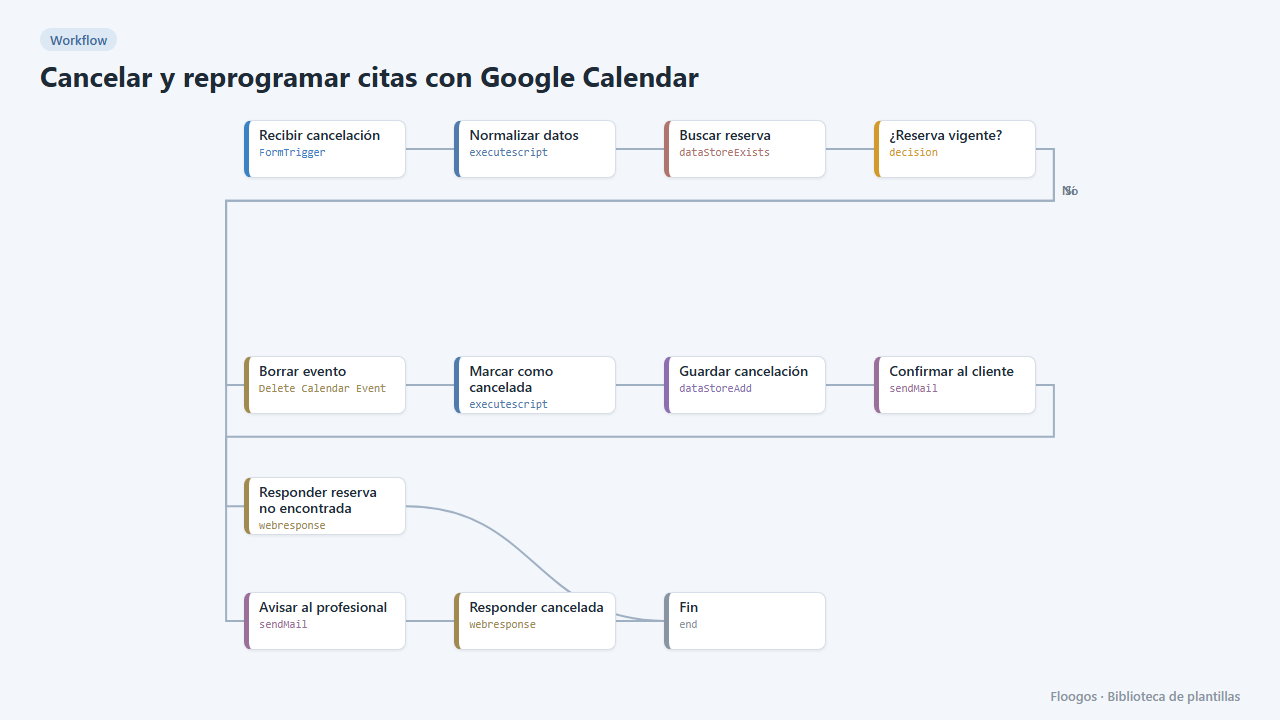
Cancel and reschedule appointments with Google Calendar
Two public forms for your customers to cancel or change their appointment with their booking code: the Google Calendar event is deleted or moved and everyone gets notified.
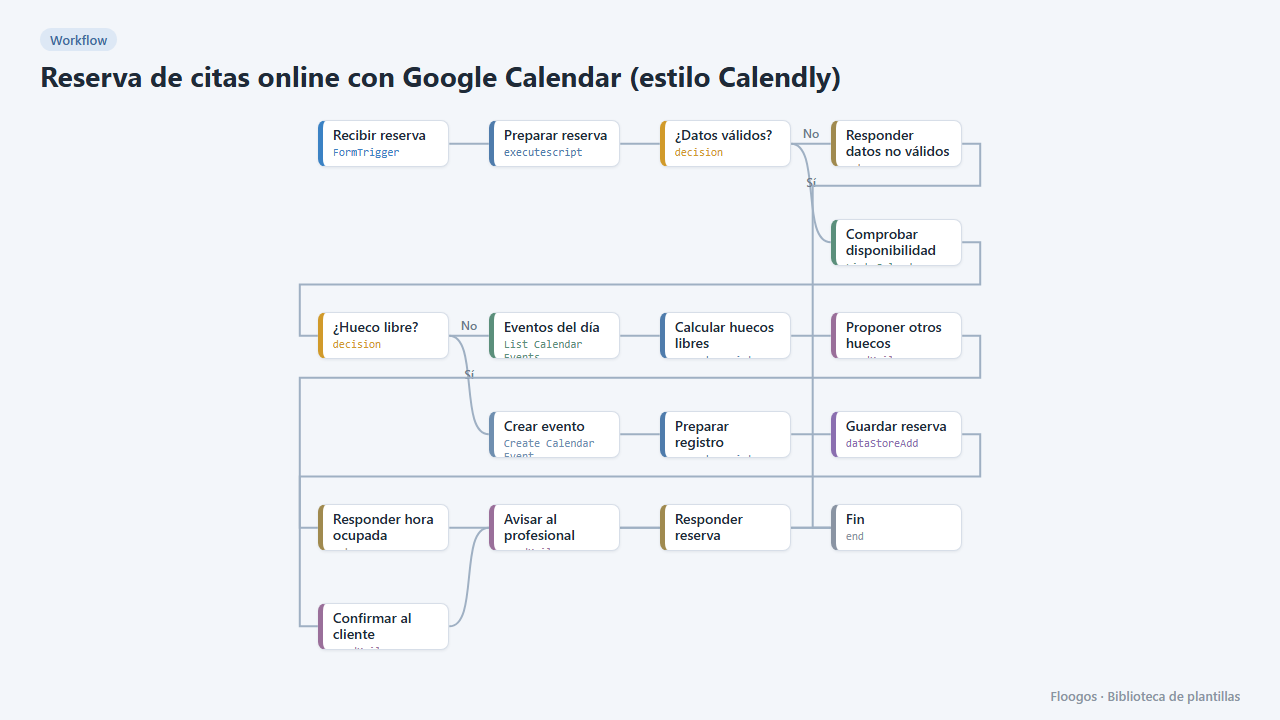
Online appointment booking with Google Calendar (Calendly-style)
A public form for your customers to book an appointment: it checks your Google Calendar, creates the event, confirms by email and, if the slot is taken, suggests the free slots of that day.
Try it in under 5 minutes
Create the template in your account, connect your credentials and activate it when you are ready.
Use this template